Saturday, September 5, 2009

Vote for Ashlee Adams

Hey ya'll. I'm definitely going to switch gears here and tell ya'll that it is possible for a woman to be inked as well as be beautiful. You guys know me as a gaming blog and everything like that, but I'm also a photographer as well.

So I definitely want to push you guys to vote for Miss Ashlee Adams as the Australian Penthouse Pet of the Year

http://www.australianpenthouse.com.au/253/january-2009-pet-of-the-month-ashlee-adams/


The second thing I want to push you all to do is vote Miss Monnie Baudelaire as Metal Ink's Maiden of the Month

http://tinyurl.com/voteformissmonnie


Both of these ladies are absolutely beautiful and I hope all my current and future readers will help them win their respective contests!

Wednesday, June 17, 2009

Learn how to dual mod a PS3 TE Fightstick with a XBOX360 Street Fighter 4 Fight Pad

So basically this is a tutorial on how to dual mod a Street Fighter 4 TE stick with a XBOX360 Street Fighter 4 Fight Pad. This is great especially if you want to only take one stick to a tournament and not have to worry about if it will be 360 or PS3 consoles.

Total time for the mod: about 5 to 6 hours

DISCLAIMER - THIS IS A MOD AND A HOW TO. I DO NOT TAKE ANY RESPONSIBILITY IF YOU SCREW UP THE MOD OR SCREW UP YOUR FIGHT STICK OR FIGHT PAD.

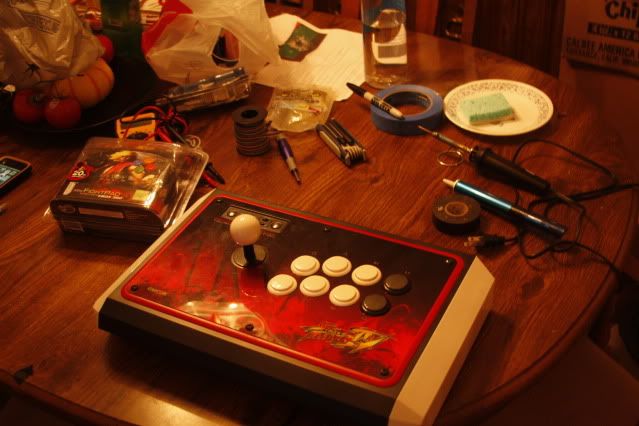
So here's basically everything you need to begin.
Photobucket

The necessary stuff
  • A Street Fighter 4 TE Stick for PS3
  • A Street Fighter 4 Fightpad for 360
  • 24 Gauge wire
  • Precision Screwdriver (Philips Head)
  • Hex Key set (3mm)
  • Silver Bearing Solder
  • Soldering Iron
  • Wire Strippers and Wire cutters

The Optional (but very helpful) gear
  • Glue gun and glue sticks HIGHLY RECOMMENDED
  • Multimeter
  • Desoldering tool
  • Electrical Tape
  • Sponge (helps keep solder from still burning after you cool it off)
  • Some type of masking tape you can write on
  • Sharpie or other type of felt tip marker.

So after you have all those parts, first thing you're going to want is your Street Fighter 4 Fight Pad.

There is 7 holes on the back of the pad, 6 that are visible and one that is hidden under the big white sticker. Using your precision screw driver, you'll want to get all 7 screws out, for the one under the sticker, just puncture it with the screwdriver.
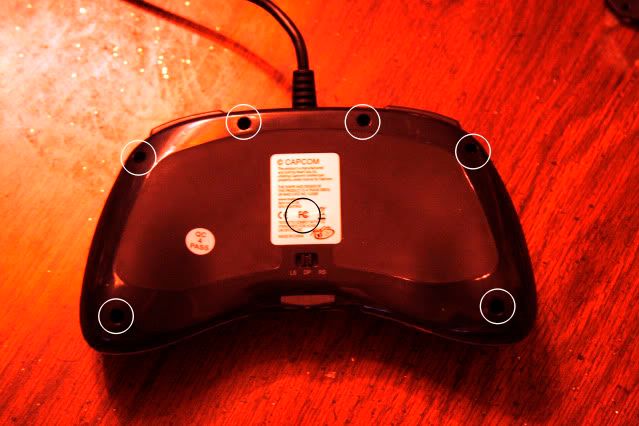
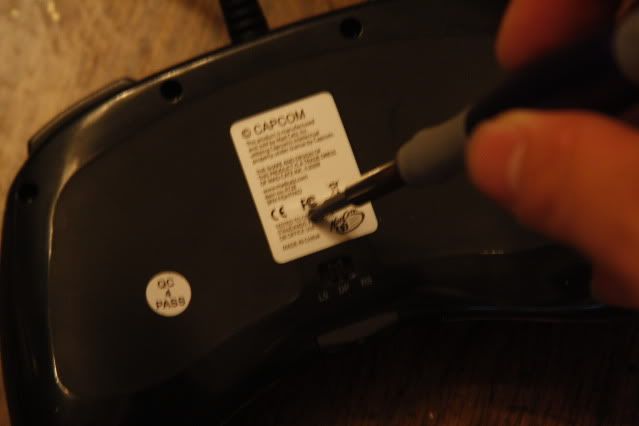
Photobucket

Photobucket

Once you open that up, there will be another 4 screws to remove from the back to free the fightpad from the front part of the controller
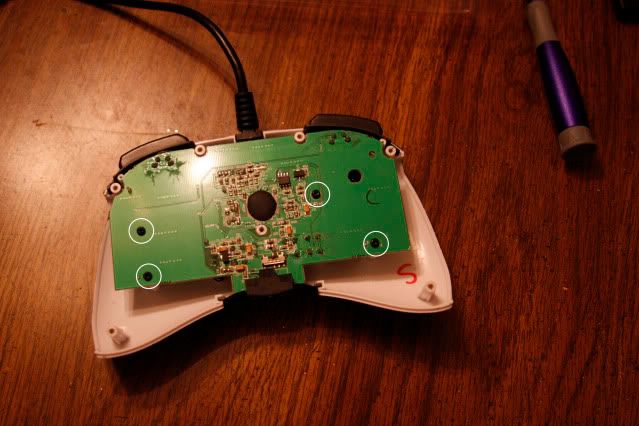
Photobucket

The next part is solely optional but it makes for a nicer looking mod.

DO NOT DO THIS PART IF YOU ARE NOT CONFIDENT IN YOUR SOLDERING ABILITIES AS YOU WILL BE WORKING IN A VERY TIGHT SPACE.
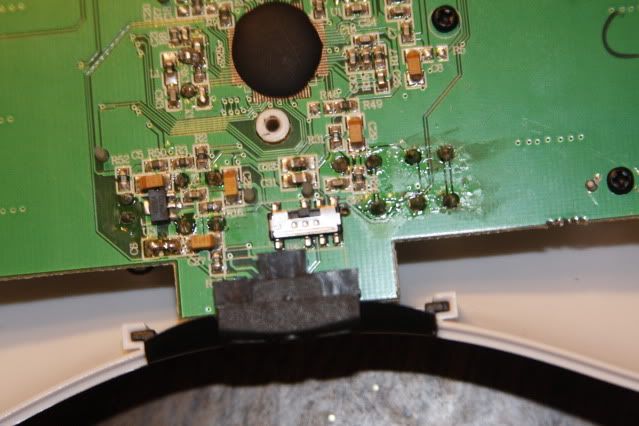
Photobucket

This is the space you'll be working to get the buttons out

Note: Unless you really want to keep these cheap buttons, you can cut them away so that you are solely dealing with the part that is soldered to the board. Take your time when you're doing this, the first time I did this mod, I wound up burning out the left trigger button.

Basically with the optional part you'll be desoldering all the buttons off the PCB.

So after that, you will now have a nice clean (or not clean) board to be working with.

Photobucket

Isn't it pretty?

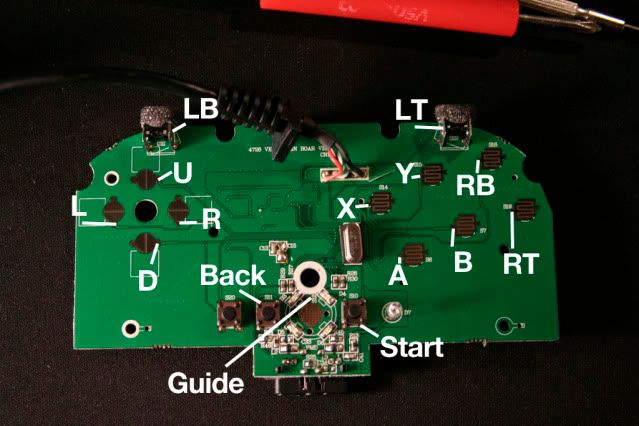
Here are the two schematics to how the buttons work.
Photobucket

Up/Down : Right Side
Left/Right: Bottom area
Face Buttons (A,B,X,etc.) It will be on the left side
LB will be the top right hole
LT will be the top left hole.
Back is the top left hole
Start is the bottom right hole.
For the guide button, there is a small dot right above the larger button that is a perfect contact point for the soldering.

The pad is completely common ground meaning you need to solder only ONE point and thats it for the ground. I chose the opposite part of the down button because it had a large area and was very simple to solder onto.

Photobucket

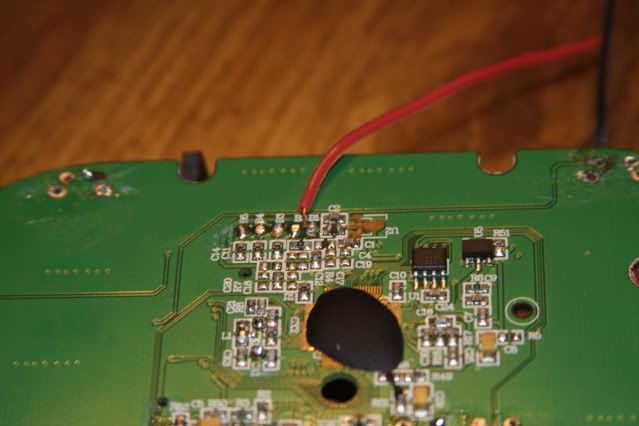
Heres the back. You also need to connect to the 5V part. A nice little trick is to expose a bit of the wire and cover the wire part with some solder. Once you do that, place the wire against the 5V connection and lightly press the iron to the wire and it should heat up just enough to connect.

The switch on the back needs to be set to the middle position, otherwise, you'll be a bit screwed.

So you'll want to solder each point with a nice length of wire. Wire is cheap, don't skimp out on it. I used probably close to 15 to 18 inches of wire and cut off a lot of it, but it's better than filling your TE stick with electrical tape.
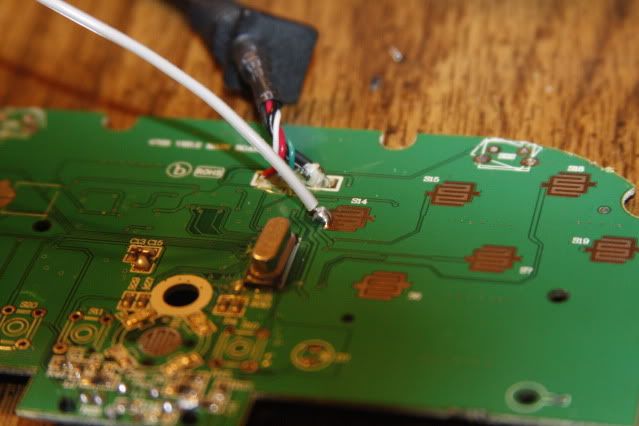
Photobucket

So you solder the connection down, then if you have a glue gun, glue that sucker down. If you don't, you'll regret it
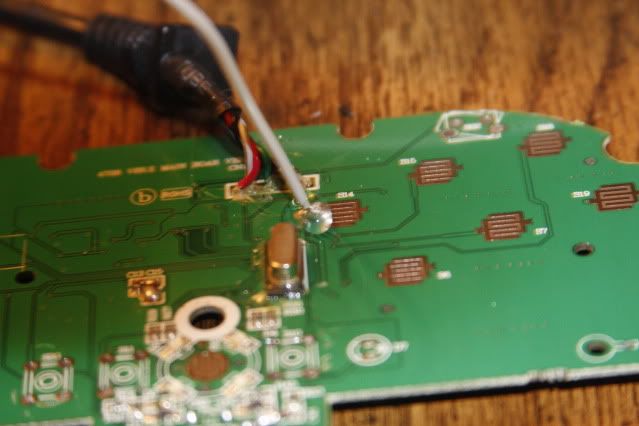
Photobucket

Photobucket
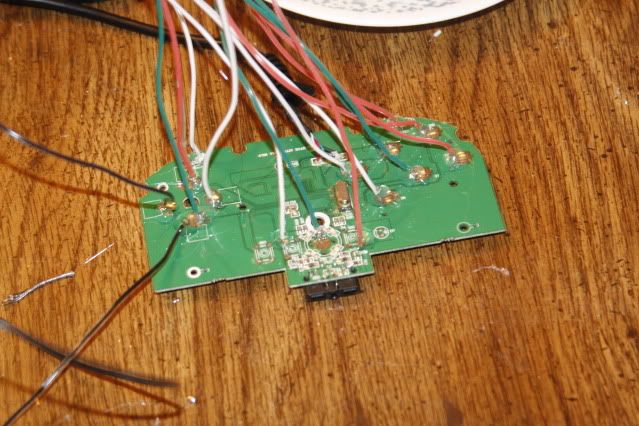
All the wires connected

Photobucket
5v connector


Okay, so there are all the connections for the wires and everything like that. Now lets move onto the TE stick.
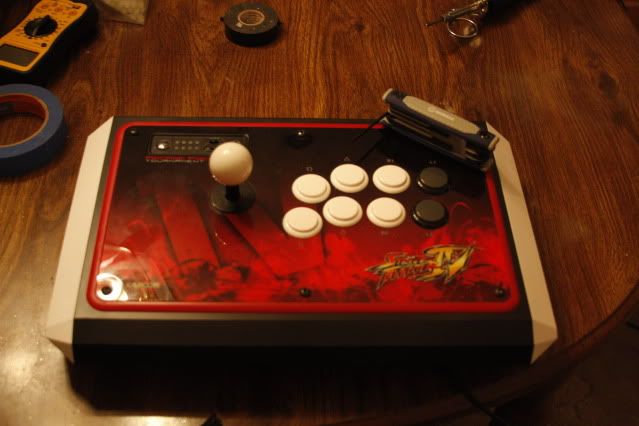
Photobucket

What you'll need is the
  • TE stick
  • Your precision Screwdriver (Philips (+) head)
  • a Standard screwdriver (Philips (+) head)
  • A 3 mm Allen Wrench
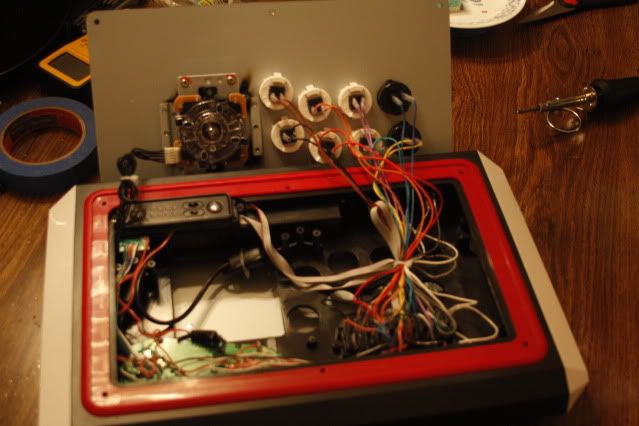
So first thing you'll wanna do is take off the top of the stick by removing the 6 3mm screws and you'll be treated to a beautiful inside as seen below
Photobucket

Remove the connector for the joystick (and remember which side the glue is on so you don't reconnect it incorrectly, and unhook all the buttons, write down how they are wired.

Next thing you'll want to do is turn the stick over and remove the 6 screws keeping the bottom plate on
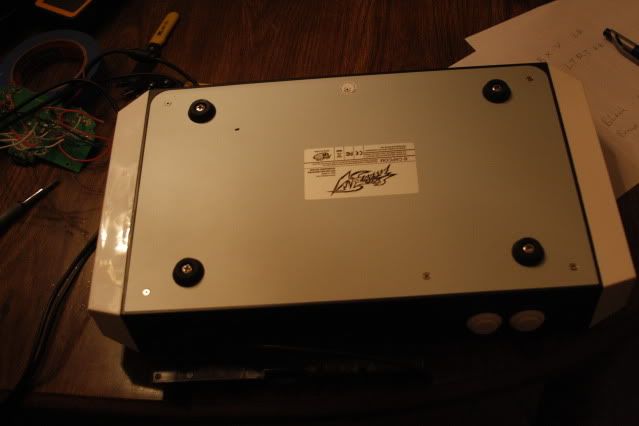
Photobucket

Then remove the screws on the bottom plate that are covered in red gunk
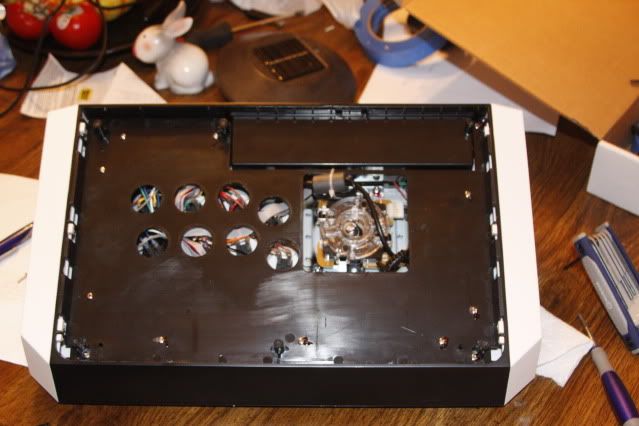
Photobucket

Then lightly pull on the plate, and if you look in the edges you'll see little white "clip" type things. those are what keep the white sides held on snuggly.
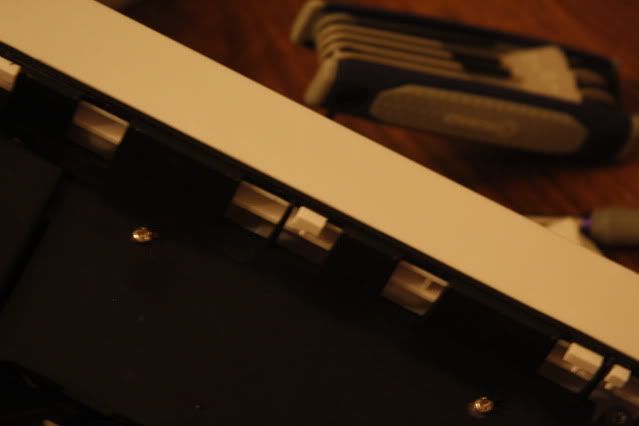
Photobucket

So once thats done, you should just have the basic chassis and be able to work from there
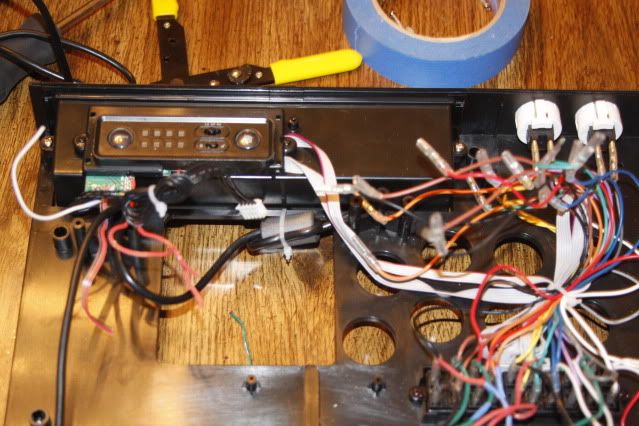
Photobucket

Okay, so the first thing you'll want to do is remove the Home/Turbo block setup with the two small screws on the sides
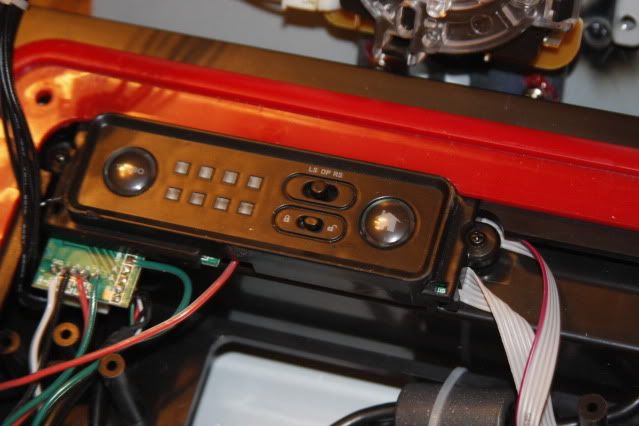
Photobucket

and then after that, unscrew the cable box from its confines, there are two screws, one on each side.
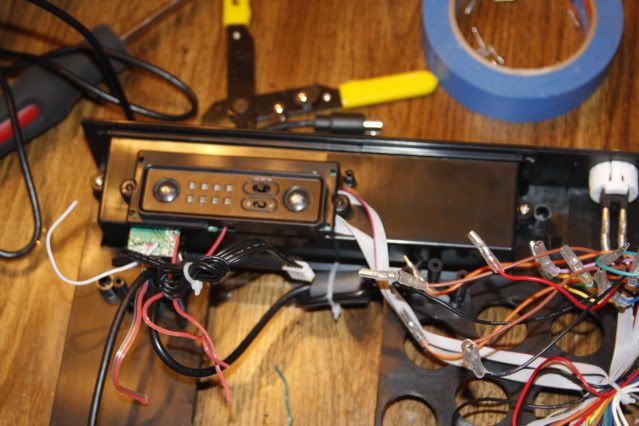
Photobucket

Once thats out, drill a hole on the left side of the cable box about 3/4s of the way up. I drilled it about 5/8s or so, but dremelled it till it was large enough to get the 360 pad dongle through.

After that part is done, slide the dongle and wire through and then rescrew the cable box back into place.

Next part will be modifying the guide button

On the small PS3 PCB, unscrew the PCB from the holder and release it from the side clips
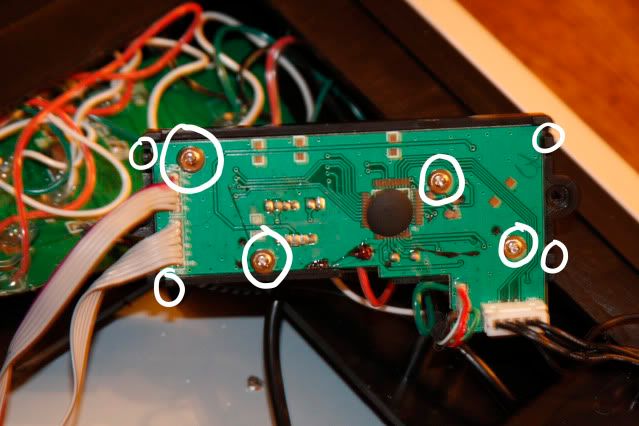
Photobucket
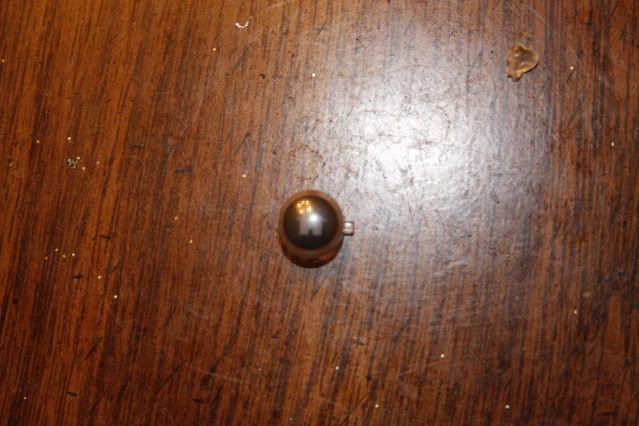
And then since no one uses turbo, there is a small gold circle next to the home button

Photobucket

Solder a wire to there and you can glue it, but that is a bad idea as you won't be able to actually push the button well. Just make sure its a solid solder connection.

Take the home button and snip the left side off so that it doesn't hit the soldered wire
Photobucket

Then put the pcb back in the holder, making sure the switches and buttons are all aligned and also feed the wire out thats connected to the home area in the little slot on the pcb

http://i6.photobucket.com/albums/y234/Slashara/TEStick_mod/024b_thread_the_wire_out.jpg

SOLDERING THE BUTTONS

Now to solder the pad buttons.

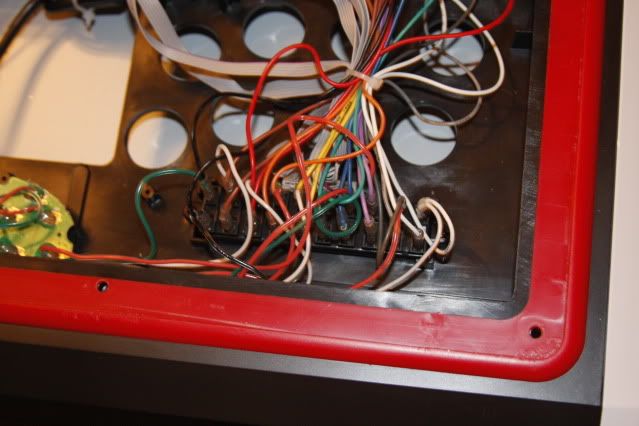
This is how the small wire cluster block in my TE stick was set up

Photobucket

Photobucket

So you basically are hooking the button assignments up to the solder points in the block.

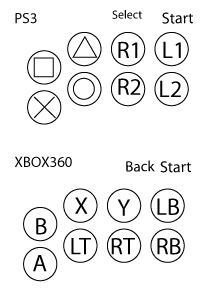
These are the button assignments I did. Top is TE stick, bottom is the 360 layout I used based off my HORI DOA Stick
Photobucket

--button assignments from fightpad--

Photobucket

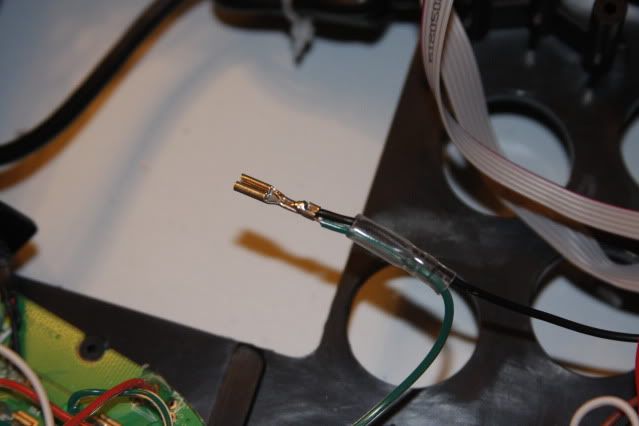
Now when you solder it, the easiest part is to take the wire, feed it through the rubber cap thing, slide the wire into the quick connect clip and solder it down, like so
Photobucket

A loose connection could cause buttons to register only half of the time

and then here is the solder points for the directions and 5V

Photobucket

U-Up
D-Down
L-Left
R-Right
USB-5V

*TIP* When doing this, best thing to do is to place some solder on the wire and make it nice and smooth, trim the wire down then put the wire against the solder point you want to connect to then lightly put some heat on the wire, the solder on the wire will heat up making a bond, then you can use a bit more solder on the area

After that, put it all back together, but leave the top unscrewed till you verify all the buttons are working

Photobucket

I Don't know if you can see it but I put the fightpad in the lower left corner of the TE stick where it fits snuggly. The fightpad PCB also has a little nich in the upper right which you can push against a post in the te stick that'll keep it nice and tight.

I hope this helps and if you have any questions, let me know via comment or email!

Monday, April 27, 2009

Warhammer 40K: Dawn of War II -- A Review

image from ign.com


Released : Feb. 19, 2009
Rating: ESRB: M
Platform: PC
Overall Rating : 4.5/5

On February 19, Relic Entertainment released the sequel to “Warhammer 40K: Dawn of War,” a popular real-time strategy game that takes place in the Warhammer 40K universe.

“Warhammer 40K: Dawn of War II” uses the Games for Windows service. Players are able to link their progress in Dawn of War II with their XBOX Live (XBL) gamertag, or create a new gamertag, and unlock achievements as they progress through the game.

The only drawback to the feature is that to access the multiplayer content, the player must be connected to the internet as well as the LIVE gaming service.

“Dawn of War II” is much different from its predecessor in terms of both single player gameplay and multiplayer modes.

In single player campaign mode, the war between the Space Marines, Eldar, and Orks hasn’t ended; they still continue the battle for complete supremacy. Unfortunately, little do they know, a new entity, the Tyranids, will make their first appearance in the Dawn of War franchise, and to the Space Marines.

The Tyranid species is best described as an alien race that decimates planetary systems in plaguing swarms and completely voids the system of life before moving onto the next system.

The player takes control of the Blood Ravens, a chapter of the Space Marines, and plays the role of a Force Commander who is sent to aid the Blood Ravens and help defend against the Orks.

The Orks are aggressive and, for a majority of the time, use weapons and tanks that are salvaged from their slain enemies, as well as things created from whatever they can find nearby.

As players progress through missions, they will have to travel to different areas, as well as perform interplanetary travel to complete missions and progress through the story.

As players continue through the campaign, they will encounter the Eldar, who are a highly technological species, using everything from energy shields to teleportation gates, called Warp Gates, to maneuver around battlefields and the Tyranids.

The single player campaign, or co-op when playing over LIVE, has changed dramatically in terms of strategy and units. In “Dawn of War,” the game play was brute force in terms of strategy, with the only tactic being to build as much as possible and then attack in a massive swarm of units.

“Dawn of War II” has completely done away with that style of gameplay. Instead, the player only gets a maximum of four squads, ranging anywhere from a single unit to 4 or more per squad and must complete the mission.

Missions in “Dawn of War II” are relatively straightforward as far as objectives go. The players can go in with guns blazing, heading straight for they target, or they can explore the map and capture unique buildings for beneficial abilities, as well as kill more enemy units located at outposts across the map.

Whichever strategy the players choose, at the end of the mission they are rated on how many squads survived, without dying once, from start to finish; the number of enemy units you killed; and the time it took you to complete the mission. Additional bonuses are accrued for capturing planetary foundries and unique buildings.

“Dawn of War II” takes on the characteristics of a role-playing game in that during and after each mission, the squad leader of each squad, as well as the Force Commander, gain experience points through the various missions. Gaining experience points enables the ability for squad leaders to level up and then players can add points to personal traits as well as equip better wargear, such as poweraxes and armor.

Wargear is obtained after completing missions, as well as killing units or completing specific tasks during missions.

The multiplayer mode in “Dawn of War II” also has been drastically revamped to reflect the new gameplay and tactical style that is used in the single player campaign mode.

“Dawn of War II” features two different modes for multiplayer. The first is control point victory, where certain areas on the battlefield must be controlled for a specific amount of time to win.
The second is total annihilation, where whoever annihilates the opponents buildings, and units, first is the victor.

The first major change to multiplayer is that there isn’t a real tech tree upgrade system anymore and that all units are created from one primary HQ building; any other upgrades are performed on the field of battle.

This allows the player to focus on what is happening on the frontlines, as opposed to sending units off and then going back to using the real-time strategy cliché of base building made popular in games like “Warcraft 3” and “Age of Empires.”

The second major change is that one of the vital elements needed to create units, power, is now obtained on the field by capturing and maintaining control of buildings on the battlefield called power nodes.

An additional feature of multiplayer is that before the battle is started, each player gets to select a specialized hero unit, which is available at the start of the game.

Players get a choice of three hero units. They can be anything from a brute offensive melee specialist to an infiltrating stealth specialist.

This gives players the chance to select units based on how they want to play their game, or when they are playing with multiple people, and want to collectively strategize.

For example, if players are playing as the Tyranids, they can choose the powerful Hive Tyrant, who obliterates any units standing in its way; the Ravener Alpha, who specializes in digging tunnels allowing for units to easily infiltrate bases and strike from below the ground; or the Lictor Alpha, who specializes in stealth, appearing out of thin air to slay the enemy.

Overall, “Dawn of War II” has separated itself from its predecessor, and even though its under the Dawn of War title, it has made its mark as its own game.

A wide improvement on graphics using the new Essence Engine 2.0, as well as a new strategy system, makes it feel like a completely different game.

The game does have its drawbacks, though. Single player is linear, as most missions are point A to point B to point C, and you can only play as the Space Marines.

This limitation prevents experiencing the point of view from the other races in the 40K universe.
The other drawback is that the Space Marines’ eternal enemies, the Chaos Space Marines, are nowhere to be found in “Dawn of War II.” This is surprising because the Chaos Space Marines are in all previous “Dawn of War” installments.

Even though there are drawbacks in “Dawn of War II,” it is definitely worth checking out whether you’re a fan of Warhammer 40K, the “Dawn of War” franchise, real-time strategy games, or just want to run around and hack and slash at various creatures.